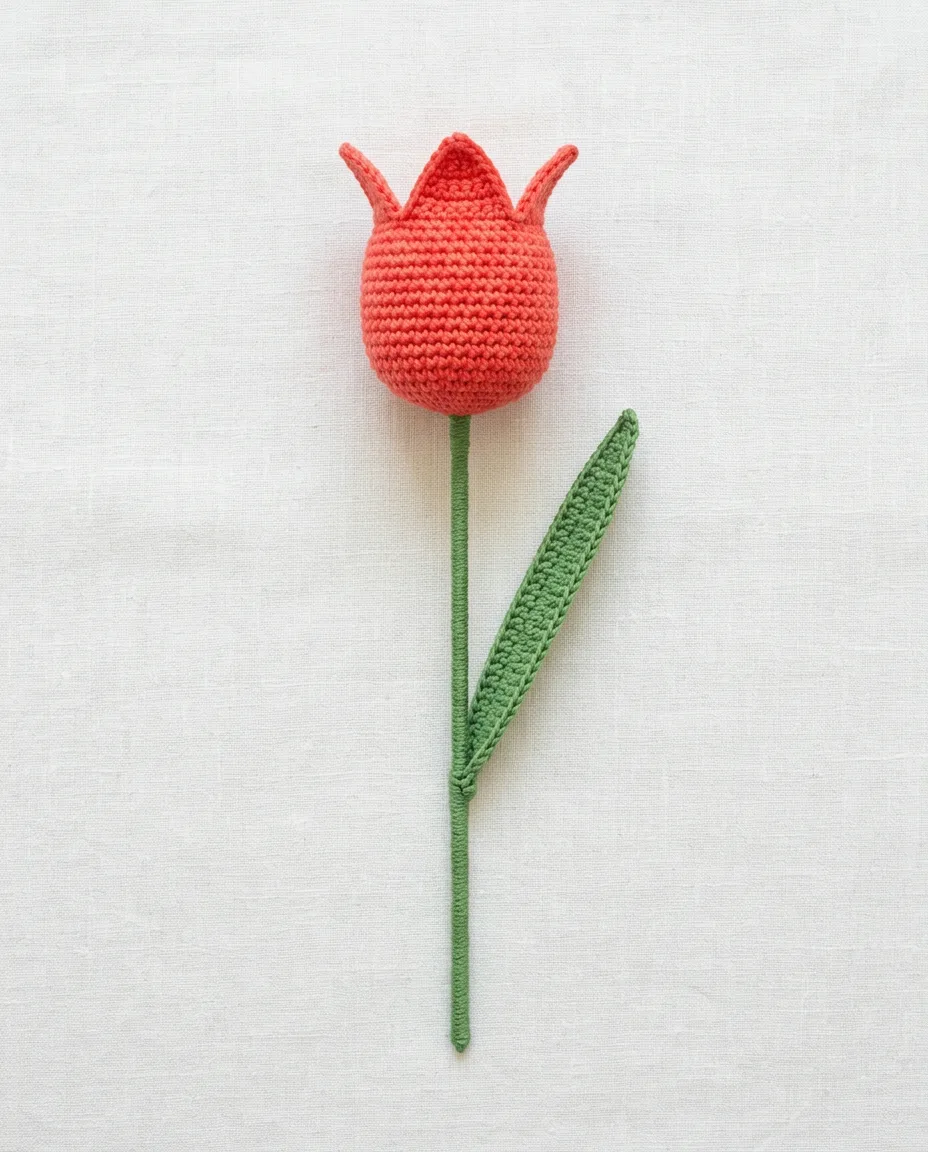
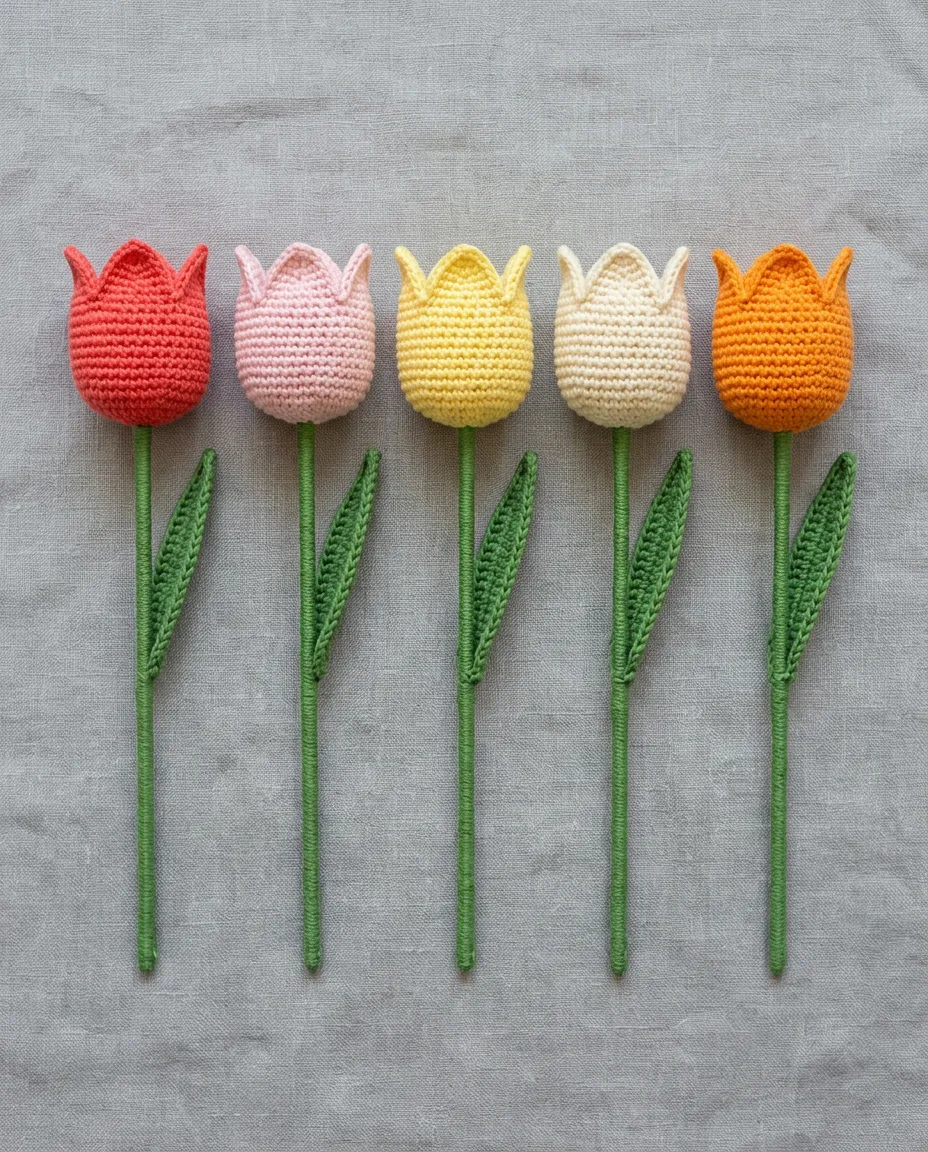
Eighteen stitches around and three petals, so one petal for every six stitches. That ratio is what makes a crochet tulip look like a tulip from across the room. Fewer petals and it reads as a closed bud. More than four and it turns into a rose. The cup underneath is a plain single crochet tube that grows from a flat circle. It holds a real 3D shape for one reason. The stitches are packed tight on a hook one size smaller than the yarn band suggests. Loose stitches and a soft cup go together.
This pattern uses US crochet terms. One tulip takes about 15 yards (14 m) of worsted weight yarn for the cup, the medium-thickness yarn marked with a 4 on the band. The stem and leaf take about 10 yards (9 m) of green. The hook is a 3.5 mm (E), which is small for worsted on purpose. The finished cup is about 1.5 inches (4 cm) across and 2.5 inches (6 cm) tall with the petals, on a stem 11 inches (28 cm) long. Budget an hour for the first one and 40 minutes after that.
Two stems are given. The firm one is a crocheted strip wrapped around a 12 inch pipe cleaner, which bends and stays where you put it. Pipe cleaners have a wire core, so a tulip for a child under 3 gets the second stem, a tube stuffed with fiberfill, the loose polyester stuffing sold in bags for toys.
Make the tulip
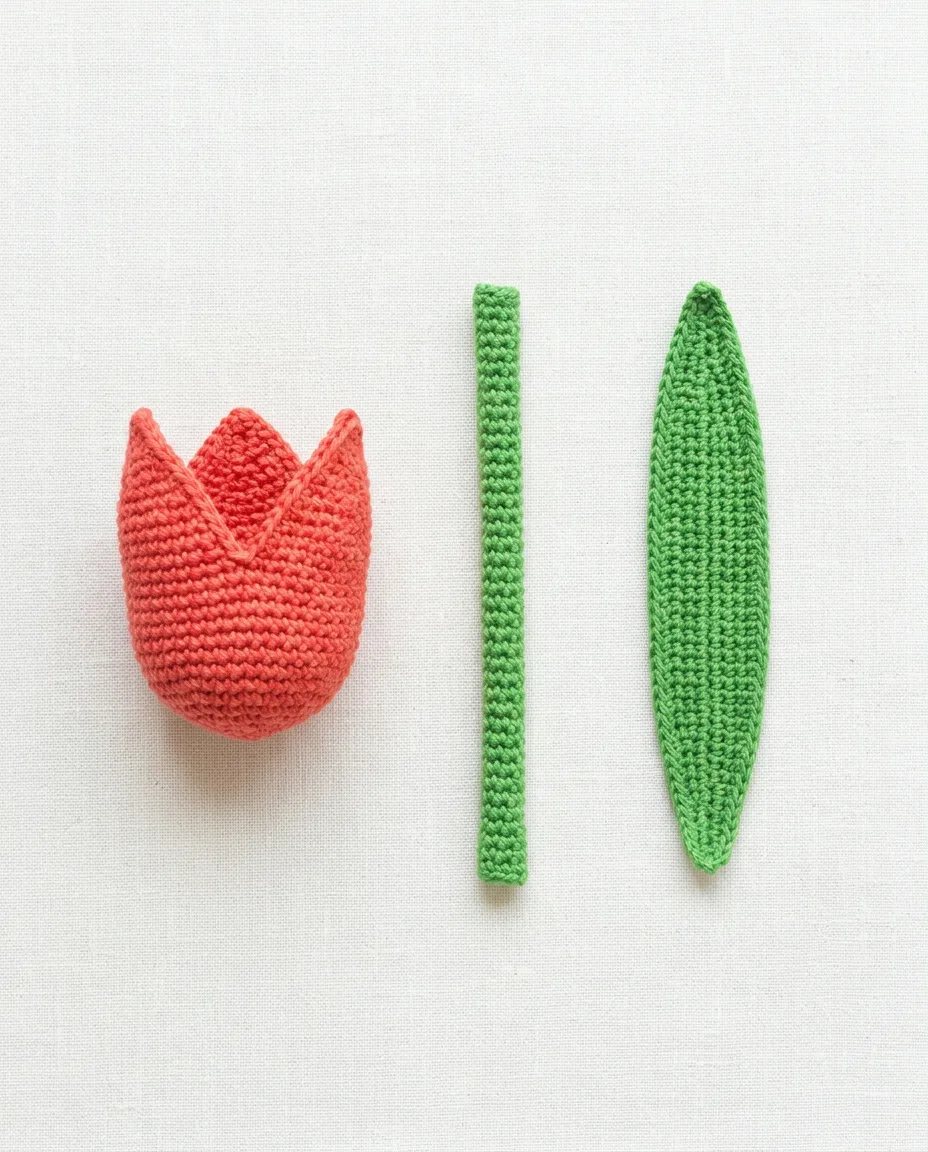
Five parts, each one small. The cup is nine rounds and each petal is six short rows. The stem and leaf are flat pieces you shape afterward, and the full rounds and rows with counts follow in the next two sections.
- Start the cup with a magic ring, an adjustable loop that pulls the center hole shut. Wrap the yarn twice around two fingers, insert the hook under both loops and pull up the working yarn, which is the strand running to the ball. Chain 1 and work 6 single crochet (sc) into the ring. For each one, insert the hook into the ring and yarn over (wrap the yarn over the hook from back to front). Pull up a loop so two loops sit on the hook, yarn over again and pull through both. Tighten the tail until the hole is just big enough to pass a pipe cleaner through later.
- Grow the cup. Round 2 is an increase (inc) in every stitch, meaning two single crochet into the same stitch, which gives 12. Round 3 alternates one single crochet and one increase for 18. Then work six rounds of plain single crochet, one stitch in each stitch, and the circle turns into a cup about 1.5 inches across. Work in a spiral with no joins and move the stitch marker up each round.
- Shape the petals. Each petal is worked back and forth on 6 stitches of the last cup round. Work single crochet across 6 stitches, chain 1 and turn the piece over. The chain 1 does not count as a stitch. Row 3 brings in the decrease (dec): insert the hook into the next stitch and pull up a loop, insert it into the following stitch and pull up another, then yarn over and pull through all three loops on the hook. Two decreases in a row of six leave four. Two more leave two, and a final decrease leaves one stitch at the point. Fasten off. Join new yarn in the next free stitch of the cup round and work the second petal the same way, and the third after it.
- Make the stem. Chain 45 and work three rows of single crochet along it to make a strip 11 inches long and about 3/4 inch wide. Fold the strip lengthwise around the pipe cleaner and sew the long edges together with the yarn needle, catching the outer loops of both edges. Fold 1/4 inch of each pipe cleaner end back on itself first so no wire tip can poke through. For the stuffed stem, work 6 single crochet in a magic ring and single crochet around for 44 rounds, feeding in a pinch of fiberfill every few rounds.
- Make the leaf and assemble. The leaf is worked around both sides of a chain of 16, with taller stitches in the middle so it widens there and narrows to points. Stuff the cup lightly, push the stem up through the hole in the magic ring, and sew the base of the cup to the stem with the green tail. Sew the leaf to the stem about 3 inches (7.5 cm) below the cup, with 6 small stitches along its lower inch so it stands away from the stem.
Cup and petals
In the rounds, sc is single crochet and inc is two single crochet in one stitch. Dec is the two-stitch decrease from step three. MR is the magic ring. Sl st is a slip stitch: insert the hook, yarn over, then draw the yarn through both the stitch and the loop on the hook. The number in parentheses is the stitch count at the end of the round or row, and every count has been added by hand against the one before it.
- 6 sc in MR 6 sts
- inc in each st around 12 sts
- (sc, inc) x6 18 sts
- sc in each st around 18 sts
- sc in each st around 18 sts
- sc in each st around 18 sts
- sc in each st around 18 sts
- sc in each st around 18 sts
- sc in each st around 18 sts
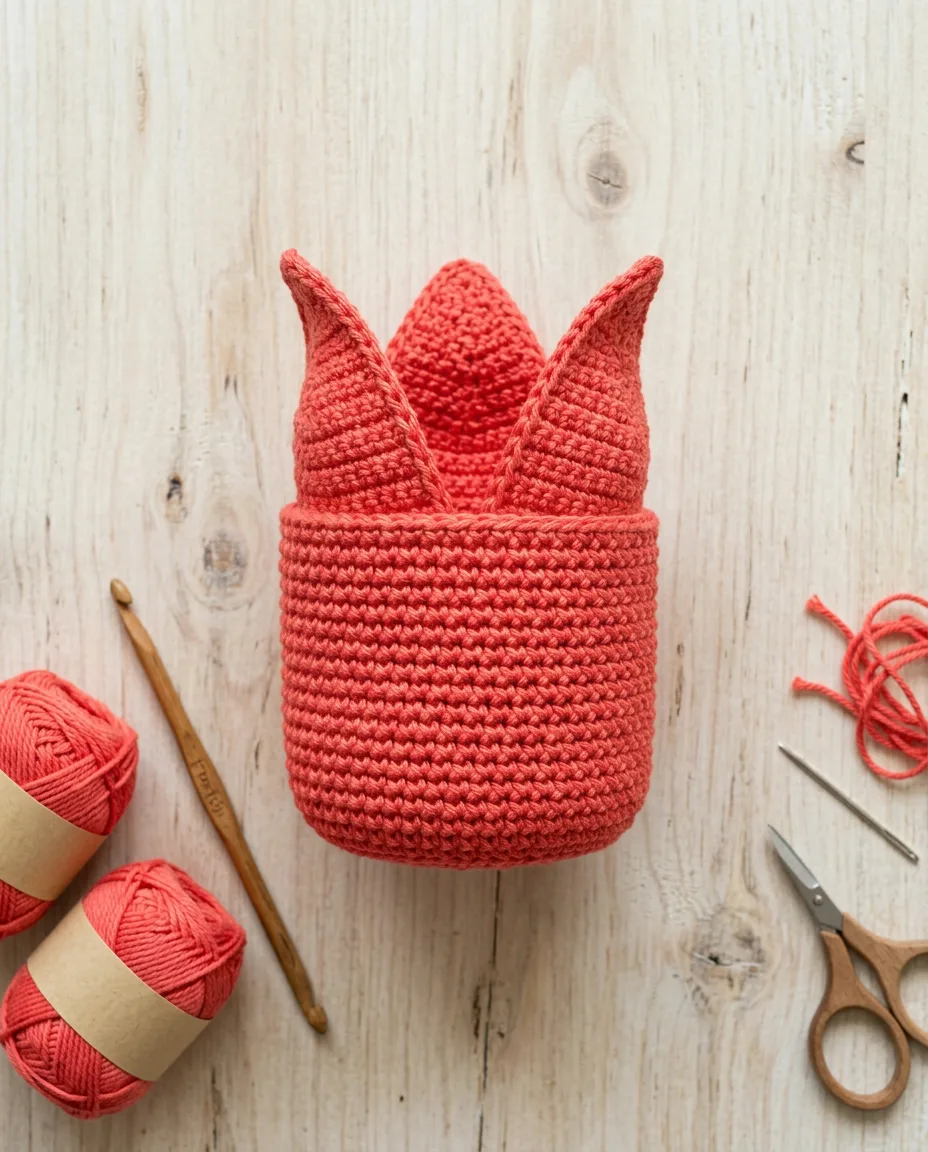
Nine rounds of worsted on a 3.5 mm hook stand about 1.75 inches (4.5 cm) tall, which is the cup without petals. Petals are worked next, one at a time, straight onto round 9. Each uses 6 stitches, so 3 petals use all 18. Chain 1 and turn at the end of every row. The chain never counts as a stitch.
 Save
Save- sc in next 6 sts of the cup, ch 1, turn 6 sts
- sc in each st across, ch 1, turn 6 sts
- dec, 2 sc, dec, ch 1, turn 4 sts
- sc in each st across, ch 1, turn 4 sts
- dec, dec, ch 1, turn 2 sts
- dec, fasten off and pull the tail through the point 1 sts
Join the yarn for the second petal in the very next stitch of round 9. Insert the hook, pull up a loop of the new yarn, chain 1 and work row 1 across the next 6 stitches. The three points should sit evenly around the rim. Weave each petal tail down the inside of the cup where the stuffing will hide it.
Stem and leaf
Three rows of single crochet make the stem strip. At 4 single crochet to the inch, 44 stitches make a strip 11 inches long. It rolls around a standard 12 inch pipe cleaner with the two folded ends tucked inside.
- ch 45, sc in 2nd ch from hook and in each ch across, ch 1, turn 44 sts
- sc in each st across, ch 1, turn 44 sts
- sc in each st across, fasten off leaving a 12 inch tail for sewing 44 sts
Two taller stitches make the leaf. A half double crochet (hdc) starts with a yarn over and the hook into the stitch. A second yarn over is drawn up as a loop, for three loops on the hook, and one more yarn over is pulled through all three. A double crochet (dc) starts the same way but finishes in two moves: a yarn over pulled through two loops, then another pulled through the last two. Both are worked into the chain on the first pass and into the unused loops on the underside of the chain on the second pass.
- ch 16, sc in 2nd ch from hook, hdc in next 4 ch, dc in next 6 ch, hdc in next 3 ch, sc in last ch 15 sts
- ch 1 for the tip, rotate the leaf and work into the unused loops of the chain: sc in first, hdc in next 3, dc in next 6, hdc in next 4, sc in last, sl st to the first sc to join, fasten off 31 sts
 Save
SaveSew the leaf on with its wide middle facing out and its lower point against the stem. For a stem that stays straight in a vase, lean the leaf slightly so the two weights balance. One leaf per tulip is the real plant’s habit and is plenty.
Colors and a closed bud
For a tulip with four petals, add one round after round 3: (8 sc, inc) x2 for 20 stitches, then work the five even rounds on 20. Each petal then sits on 5 stitches and follows the rows below. Four petals make a fuller flower that looks right in a bunch; three reads better on its own.
- sc in next 5 sts of the cup, ch 1, turn 5 sts
- sc in each st across, ch 1, turn 5 sts
- dec, sc, dec, ch 1, turn 3 sts
- sc in each st across, ch 1, turn 3 sts
- dec, sc, ch 1, turn 2 sts
- dec, fasten off and pull the tail through the point 1 sts
For a closed bud, sew the three petal tips together at the top with two small stitches of the cup color before stuffing. Leave about 1/2 inch open at the center. For an open tulip, skip that and bend each petal tip gently outward after stuffing, which the dense fabric will hold.
 Save
SaveRed with a yellow edge is the classic. A pale pink cup with white petal tips copies the two-tone varieties sold in spring. Work the petals in a second color by fastening off the cup yarn after round 9 and joining the new color for every petal. The joins hide inside the cup under the stuffing, so there is no neat way to do it and no need for one.
Where tulips go wrong
A floppy cup. Worsted on a 5 mm hook makes a cup that folds in half the first time it is picked up. The 3.5 mm hook is the fix, and if your hands run loose, go to 3 mm. Stuffing cannot stiffen a loose fabric. The cup should hold its shape empty, before any fiberfill goes in.
Petals that lean apart. Each petal is a narrow triangle, and the decreases pull the point to one side if they are stacked on the same edge. Row 3 puts a decrease at both ends and row 5 is two decreases side by side, so the pull is even. Shape the points by pinching each one between damp fingers and letting it dry pointing slightly inward.
Not enough stitches on the stem strip. Forty-four single crochet should measure 11 inches. If yours comes to 12 or more, your stitches are wide and the strip will wrap the pipe cleaner too loosely, leaving a saggy stem. Rip it out and chain 41 for 40 stitches. Keep the same hook so the stem and cup match.
And the ring that would not open. If you pulled the magic ring fully shut, push the yarn needle through the center a few times to open a hole, then push the stem through. Nothing tears. Single crochet in worsted stretches enough to pass a pipe cleaner wrapped in three layers of yarn.
Keeping them upright
Crochet tulips do not need water, so put them in a dry vase with a handful of glass pebbles to hold the stems. Stems with pipe cleaners can be bent into a gentle curve at the top so the cup nods the way a real tulip does, and straightened again by running the stem between thumb and finger.
Dust them every month or so with a soft brush. If a cup gets grubby, hand wash the whole flower in cool water with a drop of wool wash. Squeeze it in a towel and reshape the cup over a fingertip while it is damp. Let it dry upright in the vase. Never put a pipe cleaner stem in a machine. The wire bends out of true and the strip around it slides. A stuffed-stem tulip can go in a mesh bag on a cool, gentle cycle and dries in a day laid flat.